
SULFUR walkthrough: full dungeon route and boss tips
Quick answer
Start at your crashed car and follow the witch into the cave: pick up the Wakizashi, find a pistol in a chest, and shoot the rope mechanism to drop the bridge. That prologue cave funnels you straight into the game's opening area, and from there the route through SULFUR 1.0 runs Caves → Town → Sewers → Hedge Maze → Castle Dungeon → Castle → Forest → Shav'Wani Bridge → Shav'Wani Fortress → Desert → Beyond the Veil. The following route is based on the Into Indie Games complete walkthrough published at 1.0 launch, combined with Perfect Random's official Steam release notes.
| Route through every dungeon | Caves, Town, Sewers, Hedge Maze, Castle Dungeon, Castle, Forest, Shav'Wani Bridge, Shav'Wani Fortress, Desert, Beyond the VeilSULFUR – Complete Guide And Walkthrough (Into Indie Games) |
|---|---|
| Release status | SULFUR 1.0 released Oct 28, 2026 with the complete progression from beginning to endSULFUR on Steam |
| Amulet | A charged amulet freezes time and teleports you back to the church; altars mid-dungeon or the Gravedigger (for a fee) charge itSULFUR – Complete Guide And Walkthrough (Into Indie Games) |
This SULFUR walkthrough gives the full area order from the Caves to Beyond the Veil so you can clear every dungeon, based on the Into Indie Games guide.

Table of Contents
Start at your crashed car and follow the witch into the cave: pick up the Wakizashi, find a pistol in a chest, and shoot the rope mechanism to drop the bridge. That prologue cave funnels you straight into the game's opening area, and from there the route through SULFUR 1.0 runs Caves → Town → Sewers → Hedge Maze → Castle Dungeon → Castle → Forest → Shav'Wani Bridge → Shav'Wani Fortress → Desert → Beyond the Veil. The following route is based on the Into Indie Games complete walkthrough published at 1.0 launch, combined with Perfect Random's official Steam release notes.
Before you start
SULFUR is a first-person roguelite shooter: dungeons are procedurally generated, and dying loses all carried gear, items, gold, and bullets. Before each run:
- Store spare gear, gold, and bullets in the church storage — the boxes share ammo and soul coin balances.
- Repair weapons and armor at Ralphie in the church, or carry cotton swabs, bleach, or repair kits.
- Cook healing food at any stove (one per level); a cookbook drop unlocks recipes permanently.
- Charge your amulet at an altar or pay the Gravedigger by the church graves to teleport out when a run goes badly.
- Check the inventory to see which dungeon level you're on; every level ends at a gate with yellow light.
Prologue cave
Inside the cave, slash destructibles with the Wakizashi for bullets and healing items. After collecting the pistol, shoot the object connected to the raised bridge's rope to lower it. Charge your amulet at the altar beyond, then either return to church or push on into the Caves. New dungeons unlock as paths open from the church hub.
The Caves (7 levels)
Mostly goblins. The amulet altar is on level 4, a wooden-armored goblin mini-boss on level 5, and the Cousin on level 7. Shoot cracked walls with explosives to open secret caves and a secret toilet stash. Against the mini-boss, jump over its ground shockwaves, break the wooden armor, then kill it as it splits into three armored copies. For the Cousin: approach the bubbling mud puddle, shoot off its mud shield, jump its mudballs, and clear the goblin waves it summons at 50% and 25% HP. Killing it spawns an elevator back to the church.
The Town (5 levels)
Unlocked by clearing the Caves; enter via the church. Altar on level 3. Destroy masked enemies' masks — other enemies finish them off and survivors get stunned (snipers excepted). A scoped weapon helps at range. On level 5, pass the cell block, drop to the arena, and fight three masked railgun enemies who teleport between windows: block their shots with cover, punish their reloads.
The Sewers (4 levels)
Same enemies as Town, plus variants covered in a hard black crust that take extra hits, and poison frogs that ambush from water. The altar is on level 3. Dive underwater to find breakables, follow the yellow-lit hole at each level's end, and survive the level-4 horde to reach the maze. There are no bosses here.
Hedge Maze
No levels, no map shortcuts: follow the castle in the distance to reach the exit. The crust-covered eye enemies only take damage through their eyes and respawn — down all the eyes with bullets, then finish them with a grenade or explosive bullets while they're incapacitated.
Castle Dungeon (4 levels)
Altar on level 3. Jump boots (Sulf Air or any +1 jump item) and a sniper rifle are strongly recommended. Skip the Drawer storage upgrade on your first clear — it eats too much inventory in an ambush-heavy area. Kill cultist assassins on sight; more enemies usually means you're on the right path, and missed jump platforms are the usual reason you feel lost. The level-4 executioner mini-boss breaks when you shatter its head cone and shoot the exposed orb — then back away from the explosion.
Castle (4 levels)
Stock bullets and repair items before entering. New threats: mine cultists (shoot their mines to detonate them safely), laser cultists (attack during reload), and steam-powered robot gunners. Loot the dinner tables for cooked food. Saint Lucia waits in the throne room: let her spread her threads, clear the assassin waves with explosives, shoot the mid-arena projectiles when the castle goes dark (failing sets you on fire, succeeding sets her on fire), and keep dealing damage through her screams at 40% HP. Victory opens the path to the Forest.
The Forest (5 levels) and Terrorbaum
Altar on level 4. Stick to the roads; at forks, take the other path if one dead-ends. Crows shield up and become immune — attack between stances or shoot them mid-air. Corrupted diggers should be hit in the body, not the hands. Grab the healing mushrooms. Terrorbaum is a many-eyed tree: shoot the eyes, kill its crows, jump its underground eruptions. Past ~40% HP it uproots and dashes, plus rains sky projectiles marked on the ground — tank through and keep shooting to open the Shav'Wani Bridge.
Shav'Wani Bridge and Fortress (6 levels)
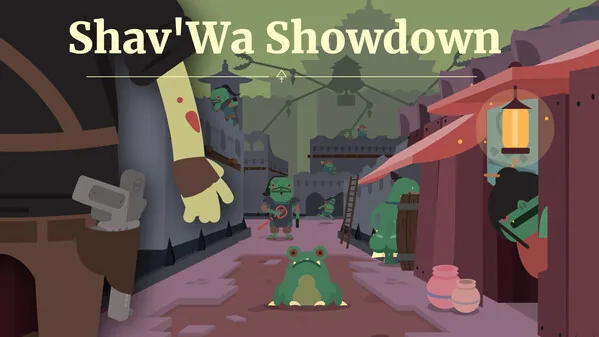
The bridge has no levels — walk straight to the golden gate. In the fortress (altar on level 3), crossbow Shav'Wani only expose their golden medallion vulnerability at intervals; kill martial-arts rushers before they close in. Level 3 dips underground and resurfaces before level 5. Top off bullets, durability, and one repair item before the boss. His Most Holy Emperor is a mechanical worm: shoot the last ball, avoid its dive shockwaves, and note that dropped balls litter the ground with a crust that clouds your vision and slows you. Phase two is a crawling spider in a circular arena — run backwards, clear the spawning Shav'Wani with grenades, and shoot its rockets to deflect them. Winning opens the drop into the Desert.
The Desert (5 levels) and Desert Santa
Altar on level 3. Hellshrew drillers erupt with shockwaves; spin-attackers are bullet-immune while spinning; snipers hide as plants — shoot the plant. Grill two cactus pieces for solid healing. Crypt keys exist but aren't required for progression. For Desert Santa, bring a sniper or assault rifle and lots of ammo: shoot him as he jumps in and out of sand, clear the ride-drops, stay inside the shrinking dome during rocket barrages, then find and snipe his silhouette among the ruins when he disappears at ~50% HP. After the final ambush he challenges you one-on-one — just shoot him and crack open the gift boxes.
Beyond the Veil (The Witch)
Walking out of the desert arena brings you to the veil, and your amulet warns there's no return — use the amulet to go back to the church and prepare first.
Beyond the veil there's one path to the church, where the Wise Old Woman reveals herself as the witch. Picking up the amulet starts the fight: shoot her through her clone phases, keep moving through the yellow mines, jump the human-form shockwaves, jump over faster lasers in her crust-covered second form, and quickly kill the forest diggers she spawns from black orbs below 50% HP. The second half repeats everything faster — persistence and a full stock of healing carries it. Beating her unlocks Endless mode; she flees, you drive back to the prologue tree, and the loop closes. You can then replay any region or boss.
Next steps
- Boss mechanics and loot-table details pair well with our bosses page once you've cleared an area's route.
- Item attributes decide which oils and scrolls you imbue before the Castle and beyond, so check that page when upgrading guns.
- The beginner guide covers the church vendors and early-run economy in more depth if the prologue fights feel rough.
FAQ
What order should I play the SULFUR dungeons in?
Follow the walkthrough order above: Caves, Town, Sewers, Hedge Maze, Castle Dungeon, Castle, Forest, Shav'Wani Bridge, Shav'Wani Fortress, Desert, then Beyond the Veil. Each area unlocks the next, and Perfect Random's 1.0 release notes confirm this is the complete progression from beginning to end as of 2026-10-28.
What happens if I die in a dungeon?
You lose everything you're carrying — gear, items, gold, and bullets. Anything banked in church storage is safe, and a charged amulet lets you teleport out before dying. That's why the Gravedigger's paid amulet charge is worth buying before a new area.
Do I need to clear every level of an area to beat the game?
You must pass through the yellow-lit gate on each level and defeat each area's boss to unlock the next region, but optional content like the Desert crypts and secret cracked-wall caves can be skipped entirely.
Route details come from the Into Indie Games complete walkthrough published at SULFUR's 1.0 launch, checked against Perfect Random's official SULFUR Steam page on 2026-11-06. Dungeon layouts are procedurally generated, so individual runs will differ from any fixed map; exact drop rates and patch-level balance stay unconfirmed here.
Related guides for this game
Guide Guides Index

SULFUR Bosses: Full Boss List and How to Beat Each One
SULFUR bosses guide covering each encounter from Caves to The Emperor, with boss-by-boss strategies, phase tricks, and loadout advice for every fight.

SULFUR Beginner Guide: Tips and Mechanics to Survive
This SULFUR beginner guide answers how to charge your recall amulet, free at a shrine or for 1,000 soul coins from the pipe smoker next to your grave.

SULFUR Desert Santa Boss: Full Fight Strategy Guide
Learn how to beat the SULFUR Desert Santa boss on the Desert's final level with sniper or assault rifle loadout tips, sand dome phases, and bullet prep.

SULFUR Endless Mode Guide: Perk Cards and Long-Run Tips
How SULFUR endless mode perk cards work, why infinite durability and double damage matter, and how church prep and the stage-20 rollover affect long runs.
Items Guides Index
SULFUR Rare Items: Full List and Where to Farm Them
Where to find SULFUR rare items: farm rare accessories in the room after the Town boss, or get others from chests, breakables, boss rewards and vendors.
SULFUR Crypt Key: What It Unlocks and Where to Find It
The SULFUR crypt key opens the Desert crypt doors for challenge runs. Learn where keys spawn, which vendor sells them, and what you get inside.